How to change a MAC address

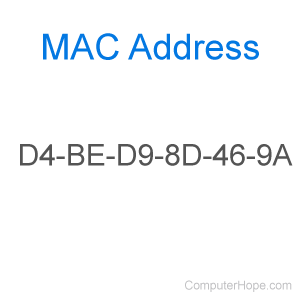
The MAC address for your network controllers and devices is used to identify they physical address of each piece of hardware. In other words, it's a unique number assigned to a device to communicate with other pieces of hardware over a network interface. Although these numbers are permanent (like a VIN (vehicle identification number) on a car), they can be spoofed, that is, changed at a software level.
To change the MAC address for your computer, select your operating system below.
Microsoft Windows
For computers with Windows Vista, 7, 8, 10, or 11, follow the steps below to change the MAC address.
- Press the Windows key, type Control Panel, and press Enter.
- If using the Category view in the Control Panel, click the Network and Internet option, then click the Network and Sharing Center option.


If using the Small icons or Large icons view, click the Network and Sharing Center option.
- On the left side of the Network and Sharing Center window, click the Change adapter settings link.
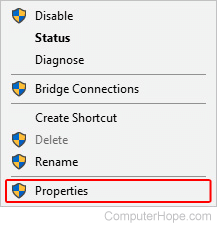
- Locate the network device you want to change the MAC address of and right-click it.

- Select Properties from the drop-down menu.

- Click the
 button.
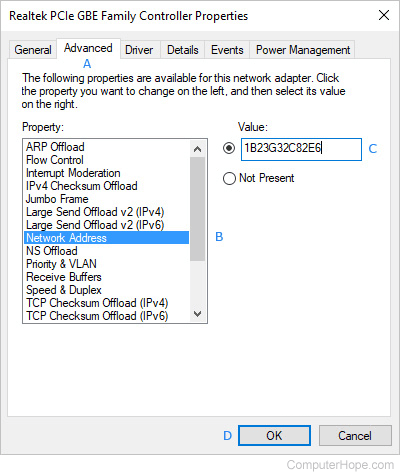
 - In the next window, select the Advanced tab (A). Then, under the Property section, select Network Address (B). If you don't see a Network Address entry in the list, select Locally Administered Address if available.
If you don't see Network Address or Locally Administered Address in the Property list, you cannot change the MAC address for that network device.
- Type your new MAC address (C) and click OK (D).

When setting a MAC address in Windows, there shouldn't be any hyphens, and it must be 16 characters long.
Apple macOS
For computers with macOS, follow the steps below to change the MAC address for a desktop or laptop computer.
After changing the MAC address on a Mac computer, when the computer is restarted, the MAC address changes back to the default value assigned by the manufacturer.

- On the left side of the screen, under the Favorites section, click the
 selector.
 - In the list of applications, double-click the Utilities app.
![]()
- Double-click the Terminal app.
![]()
- In the terminal, type the following command, replacing the x's with alphanumeric characters for the new MAC address, then press Enter.
sudo ifconfig en0 xx:xx:xx:xx:xx:xx
