How to enable and disable Microsoft Word AutoFormat feature
Updated: 05/01/2023 by Computer Hope

To enable or disable the AutoFormat feature and options in Microsoft Word, select your version of Word below and follow the steps.
Note
Some automatic formatting functionality in Microsoft Word cannot be disabled, or may only be disabled through the AutoCorrect settings. If you disable all AutoFormat and AutoCorrect features, and you still notice some automatic formatting occurring, it's likely you cannot turn off those formatting functions.
Microsoft Word Online (web version)
- Access the Microsoft Word Online web app, and open a new or existing document.
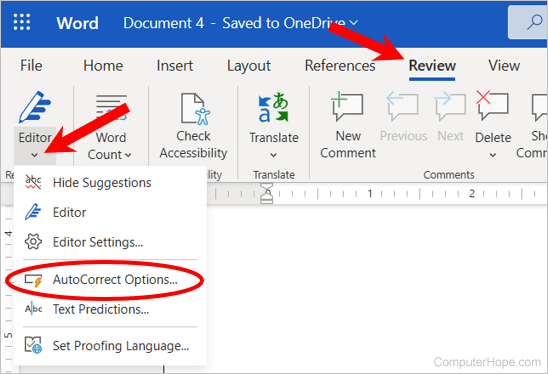
- In the Ribbon, click the Review tab.
- Click the down arrow below the Editor option in the Ribbon, and select AutoCorrect Options in the drop-down menu.

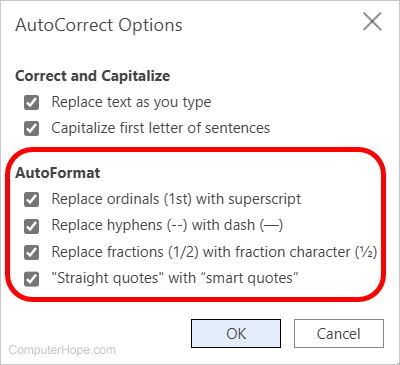
- In the AutoCorrect Options window, enable or disable the AutoFormat features you do not want to use. Check the box next to a feature to enable, or uncheck the box to disable. When done, click OK.

Microsoft Word 2007 to Word 365
- Open Microsoft Word.
- Click the File tab.
- Click the Options link in the left navigation pane.
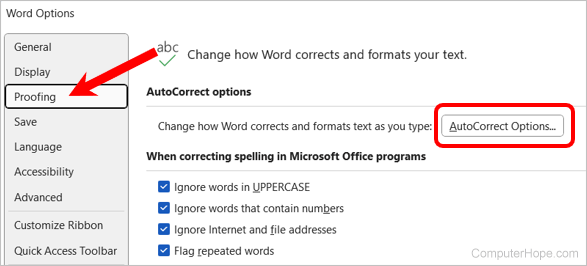
- In the Word Options window, click the Proofing option in the left navigation pane.
- Click the AutoCorrect Options button.

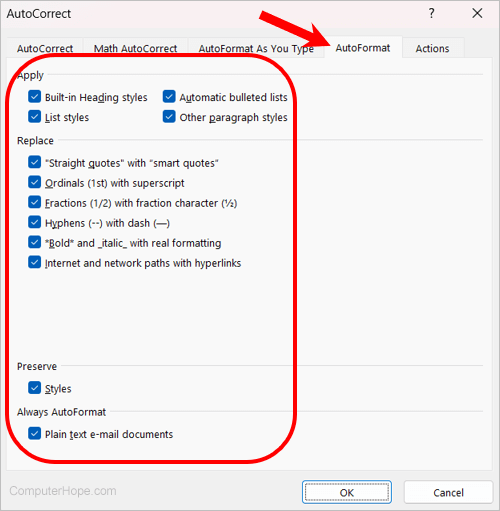
- In the AutoCorrect window, click the AutoFormat tab.
- Enable or disable the AutoFormat features you do not want to use. Check the box next to a feature to enable, or uncheck the box to disable. When done, click OK.

Microsoft Word 2003 and earlier
- Open Microsoft Word.
- In the menu bar, click Format and select AutoFormat.
- Click the Options button.
- Enable or disable the AutoFormat features you do not want to use. Check the box next to a feature to enable, or uncheck the box to disable. When done, click OK.
