How to make your handwriting into a font
Updated: 08/31/2020 by Computer Hope

Creating a font using your handwriting is a creative way to make unique letters and documents on your computer. You can type and print letters using your handwriting as the font, to add a personal touch.
To make your handwriting into a font, follow the steps below. You need access to a printer and a scanning device.
- Visit the Calligraphr website.
- Click Create a Template.
- Choose the letters, numbers, and special characters you want to use for your font. The site allows 75 characters for free, but you can upgrade to a paid service to use more. Ideally, you will want to do all 26 letters, both uppercase, and lowercase, and all numbers. Then, choose an additional 13 special characters to make up the 75 allowed.
- Once you've chosen the characters you want to use, click Download template. On the pop-up box, select the options that best suit your needs, and click download. If you are unsure of the options, click download without changing anything. In the pop-up box that appears, click the link stating "Download your template: Calligraphr-Template.pdf."
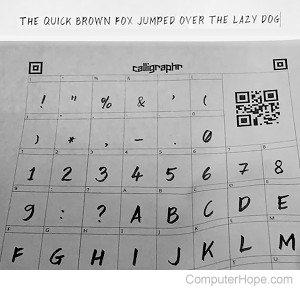
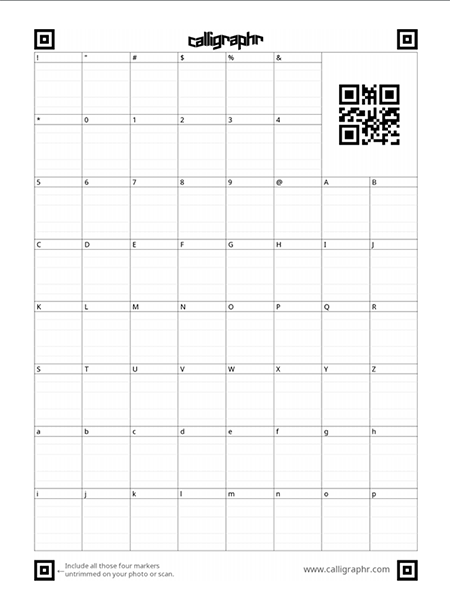
- A pop-up screen appears with boxes, similar to the screenshot below. You need to print this page(s) as is.

- Fill in each of the fields with your handwriting. Make sure each of the letters are as you want them to appear on the computer. You can use liquid paper, or whiteout, to correct any that aren't to your liking and rewrite them.
- Once you have all letters and other characters filled out on the page(s), you must use a scanner to save this file to your computer.
- After scanning the page to your computer, go back to the Calligraphr website, click My FONTS, then click Upload Template. A pop-up screen appears, asking you to select a file. Click Choose File and find the location on your computer where you saved the scanned document. Select the scanned document, click Open, then click UPLOAD TEMPLATE. This process takes a few seconds to upload your sample.
- You want to make sure all your letters and other characters line up correctly. Click the three vertical dots button near the top of the screen, shown here, then click Adjust Baseline.

- Use the arrow buttons provided to make sure all of the letters line up in the same position on the lines displayed. At this point, you can also adjust the sizing of any characters that look different from the size of the others, so they look uniform.
- Once you've completed any necessary adjustments to the characters, click SAVE ADJUSTMENTS.
- If there are any characters that have flaws you don't like, click the individual letter and edit out any imperfections. Once finished, click back to MY FONTS.
- Click Edit Font Details, and adjust the "Letter spacing," "Font Size," and "Word Spacing." This process is trial and error, and may take several attempts. You need to go back and forth between the Edit Font Details screen and the Build Font screen several times to get the look you want. The only preview of your font is in the Build Font screen. To see it in actual sentences as a preview, you have to click the generated font file.
- In the Build Font section, you can preview your font. Name the font what you want. It can be your name or any other title you choose.
- After naming the font, click Build. A preview of your font appears as the letters, numbers and other characters you chose. To see what your font looks like, click one of the font files: "Name-Regular.ttf" or "Name-Regular.otf." Clicking one of these links brings up a preview screen, showing your fonts as sizes 12 through 72, and what they look like as each size. If they don't look right, make adjustments to either "Adjust Baseline" (if the letters don't line up correctly) or "Edit Font Details" (if the font is too small or has bad spacing).
- Once you have the font the way to want it to appear, click the "Install" button in the preview of the font link. Your new font is installed to your computer.
