How to add or remove a text box in Microsoft Excel
Updated: 03/06/2020 by Computer Hope

Microsoft Excel allows users to add or insert a text box in a spreadsheet. A text box is a separate area in your spreadsheet, with boundaries and position that you can change. The text you place inside the box wraps to the next line at the boundaries of the box.
Using a text box, you can create a block of text that appears above, below, or next to data, charts, or other objects. Text boxes allow for diverse text placement, helping you to create a more interesting and informational layout in your spreadsheet.
After adding a text box, you may decide to change the size of the text box, or to remove it. Click a link below and follow the instructions for adding, resizing, or removing a text box in Excel.
Add a text box
- Open Microsoft Excel.
- In the Ribbon, click the Insert tab.
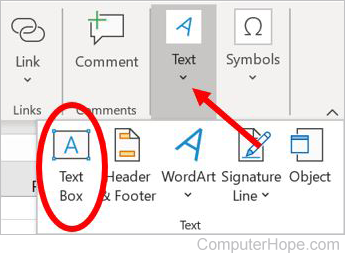
- On the Insert tab, click the Text option on the far right side, and select the Text Box option.

- Move the mouse cursor to where you want the text box to be located. Press and hold the left mouse button, then drag the mouse down and to the right to "draw" the text box. The further you drag the mouse, the larger the text box that is created.
Resize a text box
- Open the Excel spreadsheet containing the text box.
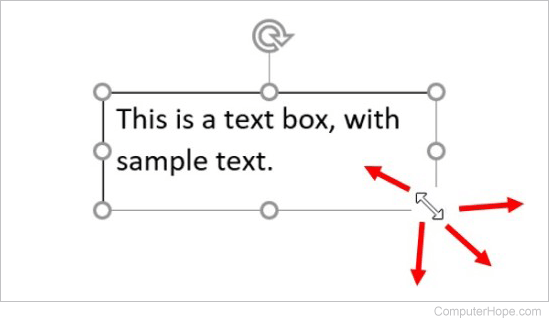
- Find the text box and click the outer edge to select it. When selected, there are small circles on each corner and in the middle of each side of the text box.
- Place your mouse cursor over one of the circles on the outer edge or corner of the text box, so the cursor changes to a double-sided arrow.
- Press and hold the left mouse button on the circle, then drag the mouse cursor in the desired direction to increase or decrease the size of the text box.

