How to change default font settings in Microsoft Office programs

Microsoft Word, Excel, PowerPoint, and Outlook have default font settings, like font size and font type, that take effect when using the programs. Users can change these font settings on the fly through the program menus.
When the program is closed and opened again later, any font setting changes revert to their defaults.
The default font settings can be changed so that a preferred font type or font size are set and used each time the program is opened. Select a Microsoft Office program from the list below and follow the instructions to change the default font settings for that program.
If you are using the Microsoft Office Online (the web version) programs, you cannot change the default font settings. Only in the Microsoft Office desktop programs can you change the default font settings.
Microsoft Word
- Open Microsoft Word and create a new blank document. See: How to create a document.
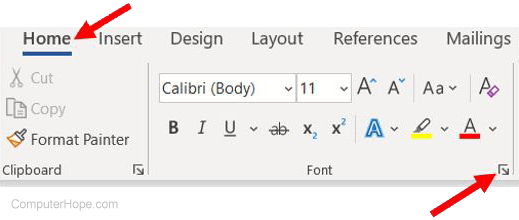
- On the Home tab, click the small icon in the bottom-right corner of the Font section. The icon has an arrow pointing down and to the right.
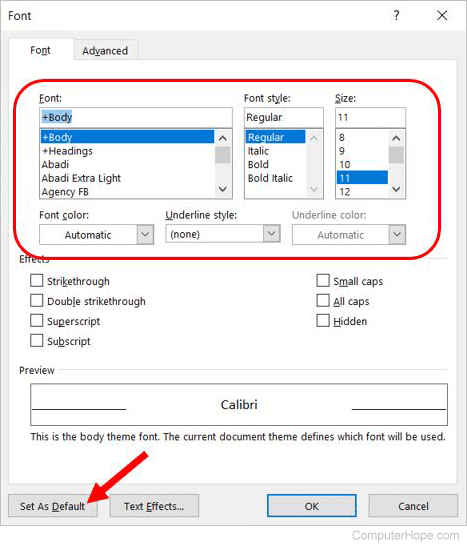
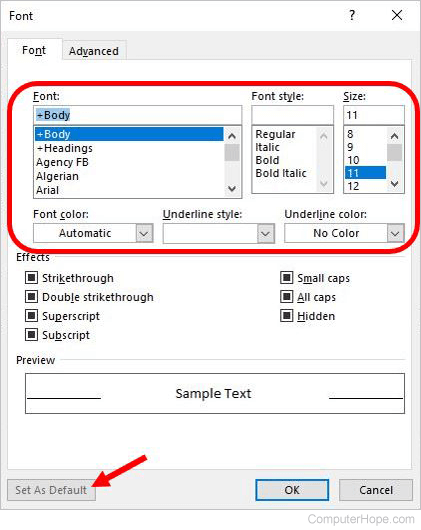
- In the Font window, select the Font, Font style, Size, or any other font settings that you want set as default.
- Click the Set As Default button at the bottom of the Font window, then click the OK button to save the new default settings.
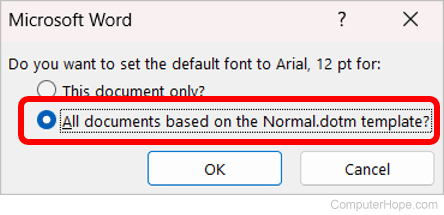
- If asked to choose to change the default font settings to the current open document or the Normal.dotm template, select the template option and click OK.
Microsoft Excel
- Open Microsoft Excel. See: How to create a new blank workbook.
- Click the File tab near the upper-left corner of the program window.
- In the left navigation pane, click Options.
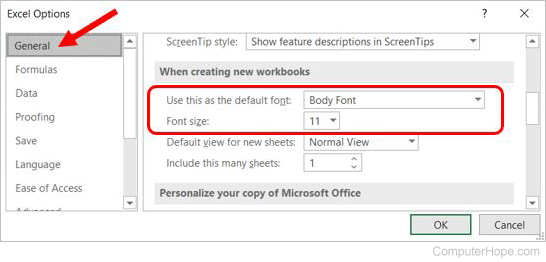
- In the Excel Options window, make sure the General option is selected in the left navigation pane.
- Under the When creating new workbooks section, set the default font or Font size to your desired options, then click the OK button to save the changes.
- Click OK if prompted to close and restart Microsoft Excel to apply the new default font settings, then close Excel and re-open it.
Microsoft PowerPoint
For Microsoft PowerPoint, changing the default font settings requires you to go through two processes. First, you must change the font settings for a currently open presentation and slide deck, and second, you must create a slide template with the font setting changes in effect. Then, you can use that slide template to create all future slides, utilizing the default font settings you selected.
Change font settings
- Open Microsoft PowerPoint. See: How to create or add a slide in Microsoft PowerPoint.
- Click the View tab.
- In the Master Views section, click the Slide Master option.

- On the Slide Master tab, in the Background section, click the Fonts option and select a font in the drop-down menu to set as default.

- Click the Close Master View option on the far right of the Slide Master tab.
A font type is the only font setting that can be set as default. A default font size cannot be set.
Create a new slide template
- After following the steps above to select a default font, click the File tab near the top-right corner of the program window.
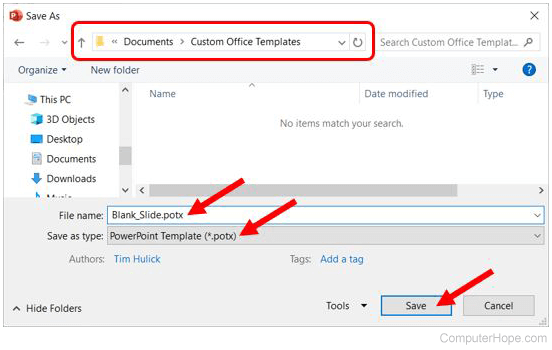
- Click the Save As option in the left navigation pane.
- Click the Browse option.
- In the Save As window, navigate to the following folder.
C:\Users\<your Windows username>\Documents\Custom Office Templates
- In the File name field, enter a name for the template file.
- In the Save as type drop-down list, select PowerPoint Template (*.potx) entry.
- Click the Save button to save the template file.
Select slide template for a new presentation
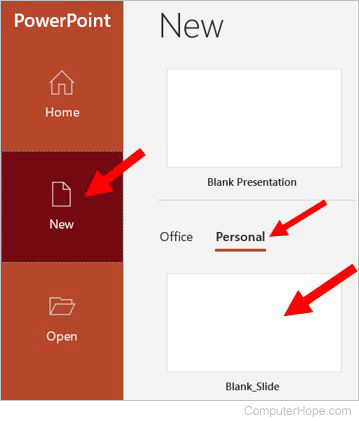
When you create a new presentation in Microsoft PowerPoint, you can use the new template, with the selected font type, you created with the steps above.
- Open Microsoft PowerPoint and click the New option on the left side of the program window.
- Below the Blank Presentation option, click the Custom or Personal tab, depending on your version of PowerPoint.
- Click the template you created.
- If a mostly blank, white window opens, click the Create button to create a presentation and slide.
Microsoft Outlook
- Open Microsoft Outlook and click the New Email option on the Home tab.
- In the new e-mail message, click the File tab.
- In the left navigation pane, click Options.
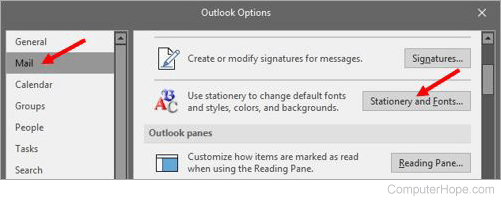
- In the Outlook Options window, click the Mail option in the left navigation pane, if not already selected.
- Click the Stationery and Fonts button.
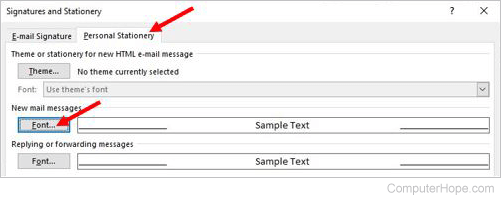
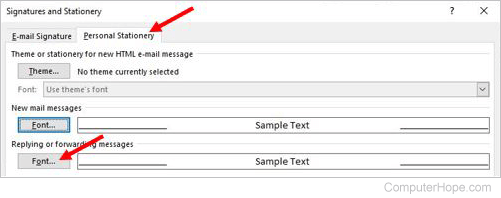
- In the Signatures and Stationery window, on the Personal Stationery tab, click the Font button under the New mail messages section.
- In the Font window, select the Font, Font style, Size, or any other font settings that you want set as default.
- Click the Set As Default button if available, then click the OK button. If the Set As Default button is grayed out, click the OK button.
- Back in the Signatures and Stationery window, on the Personal Stationery tab, click the Font button under the Replying and forwarding messages section.
- Repeat steps 7 and 8 above to select the desired font settings.
- Click OK on the Signatures and Stationery window, and on the Outlook Options window.
- Close the new e-mail message window without saving it.
The selected font settings are now set as default for new e-mail messages, and e-mails you reply to or forward to other people.
