How to change to and from military time in Windows
Updated: 07/31/2022 by Computer Hope

The Windows operating system offers many customization options to its users. One of these features is the ability to not only change the time zone, but how the time is displayed. More specifically, you can switch the clock in Windows between 12 and 24-hour display modes (also called civilian and military time).
To learn how to change to and from military time in Windows, select your Windows version from the list below and follow the steps.
Windows 8, 10, and 11
- Press the Windows key, type Change the date and time, and press Enter.
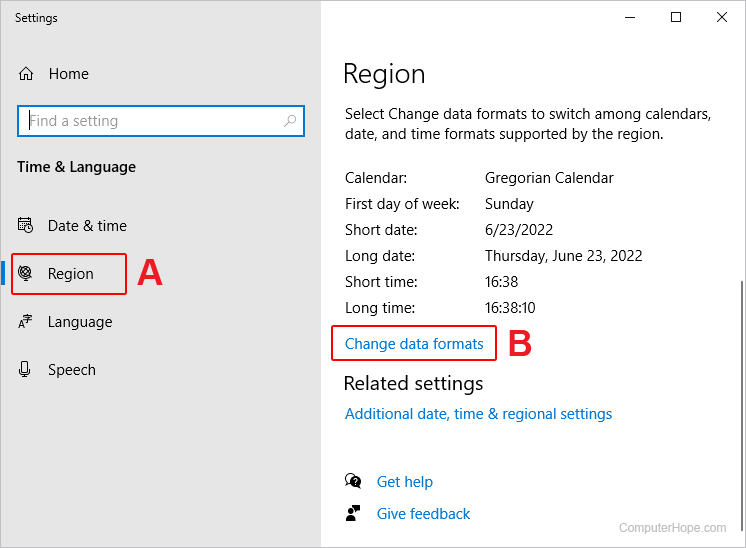
- On the left side of the new window, click the Region selector (A).
- Scroll to the bottom of the section on the right and click Change data formats (B).

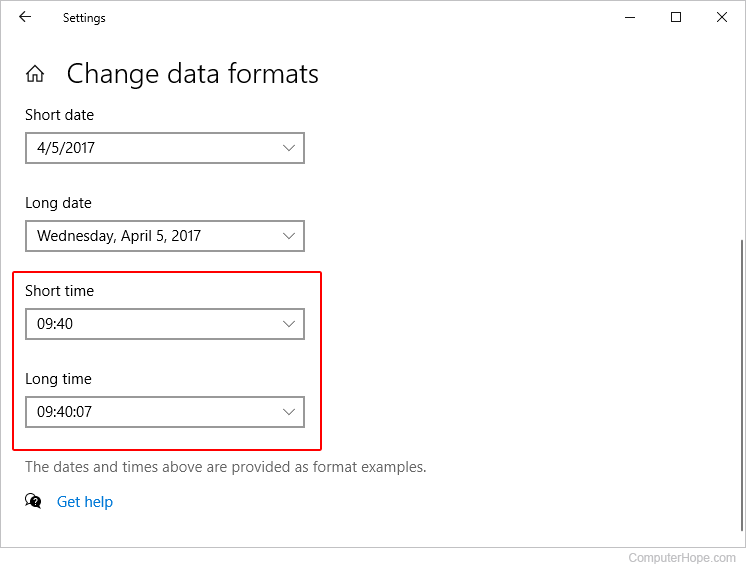
- Scroll down to locate the sections labeled Short time and Long time.

- Click the down arrow
 on the right side of each section. To set civilian (12-hour) time, select an option with "AM" or "PM" text. For military (24-hour) time, choose one without any text.

- When you're finished, close the Settings window.
Windows Vista and 7
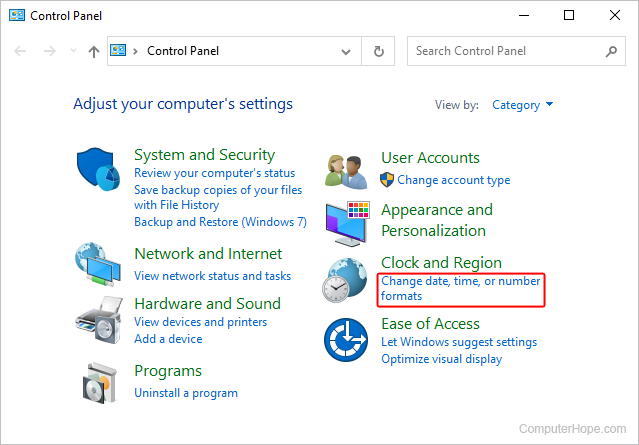
- Press the Windows key, type Control Panel, and press Enter
- In the Control Panel window, under the Clock and Region section, select Change date, time, or number formats.

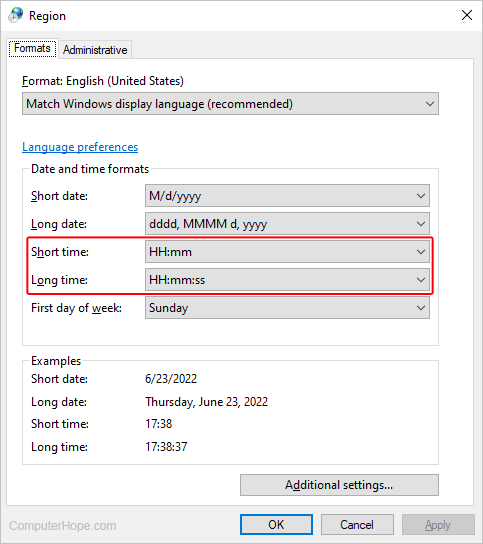
- At the top of the next window, click the Formats tab.
- Locate the sections labeled Short time and Long time.

- Click the down arrow
 on the right side of each section. To set civilian (12-hour) time, select an option with "tt" text. For military (24-hour) time, choose one without "tt" in the entry.

- When you're satisfied with your choices, click
 , and then click
  .
.
