How to remove a printer from a computer
If you are setting up or installing a new printer on your computer, you may want to remove one or more previous devices that are no longer in use. While there is no harm in leaving old printers installed, removing them frees up storage space and declutters the list of available devices on your computer.
To remove a printer from your computer, including its software, choose your operating system from the list below and follow the steps.
Windows computer
There are a few ways to remove a printer from your computer, depending on your version of Windows. Method one works for any version of Windows after Vista, and method two is exclusive to Windows 10 and 11.
Method one
- Press the Windows key, type Control Panel, and press Enter.
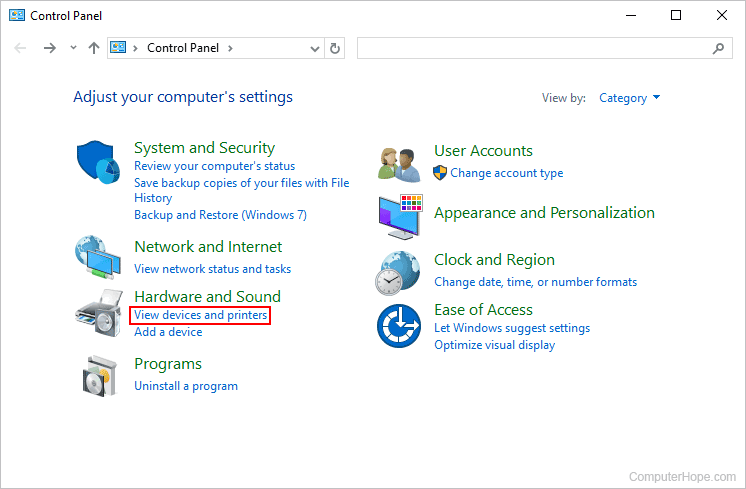
- In the Control Panel window, under Hardware and Sound, click View devices and printers.
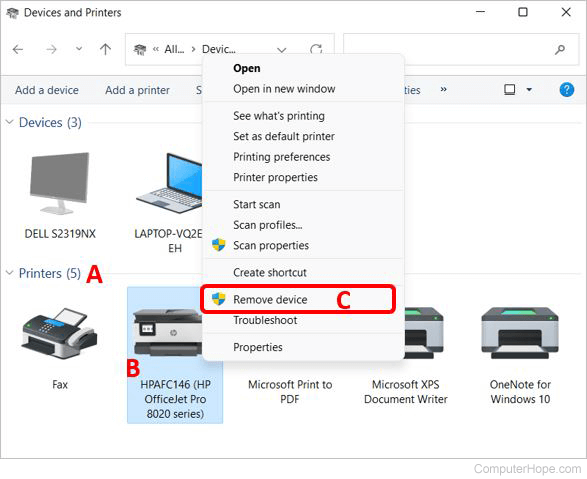
- In the Devices and Printers window, under Printers (A), locate and right-click the printer you want to remove (B).
- Select Remove device from the drop-down menu (C).
- When prompted, click Yes to confirm the removal of the printer.
Method two
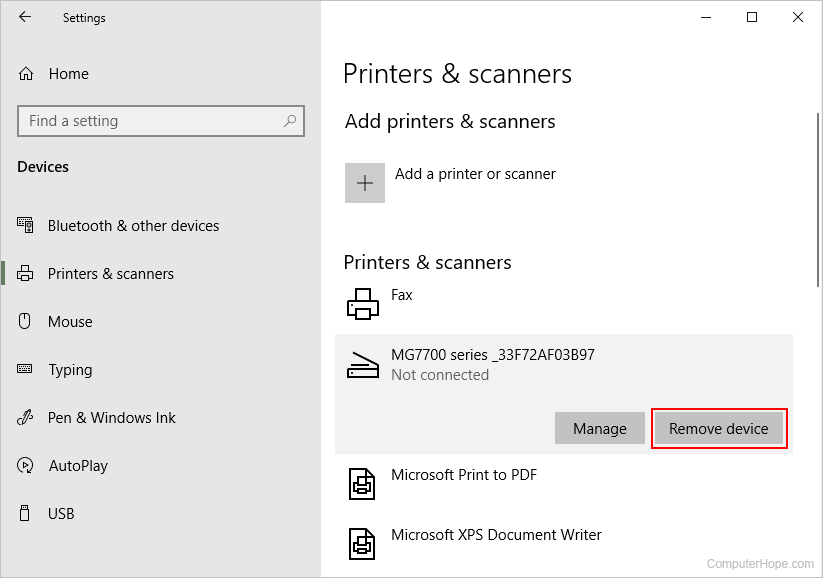
If you're using Windows 10 or 11, uninstall a printer through the Settings utility.
- Press the Windows key, type Printers & scanners, and press Enter.
- Locate the printer you want to uninstall and click it to expand the entry.
- Click the Remove device button.
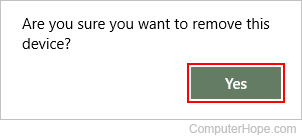
- In the prompt, click the Yes button.
Removing printer software
After removing a printer, you may want to uninstall the associated software from your computer too. Here's how to uninstall that software.
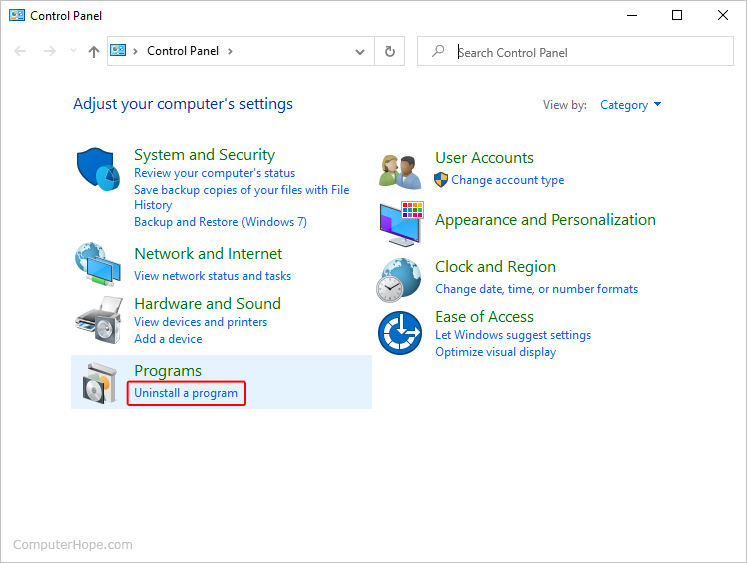
- Press the Windows key, type Control Panel, and press Enter.
- In the Control Panel window, under Programs, click Uninstall a program.
- Locate and select the printer software in the list, and click the Uninstall option in the menu bar above.
- Proceed through the steps to uninstall, clicking Yes when prompted.
macOS computer
If you're on a computer running macOS, like an iMac or MacBook, follow the steps below.
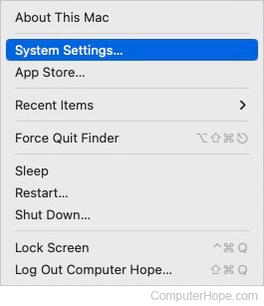
- At the top-left corner of the desktop screen, click the Apple icon.
- Select System Settings in the Apple menu.
- In the sidebar, scroll to the bottom and click the Printers & Scanners selector. In the section to the right, click the printer you want to remove.
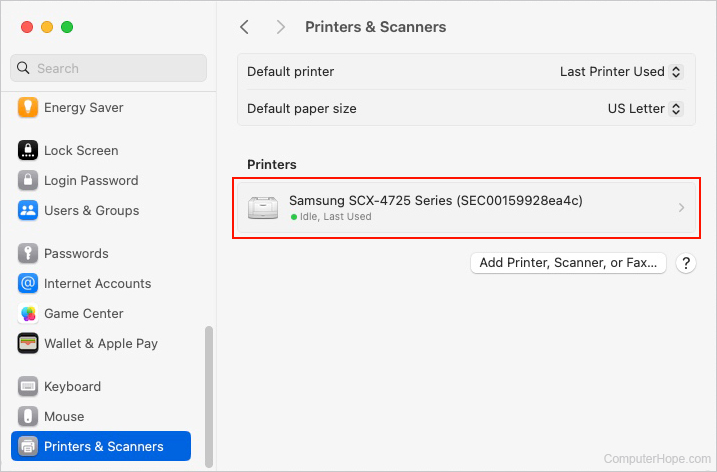
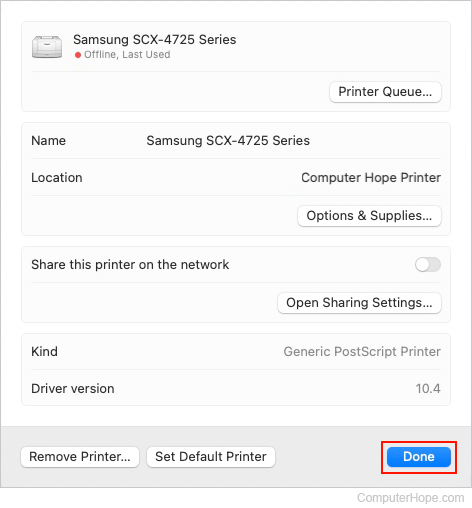
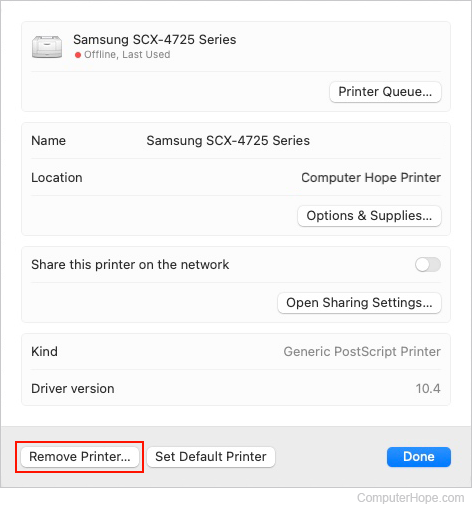
- At the bottom of the new window, click the Remove Printer button.
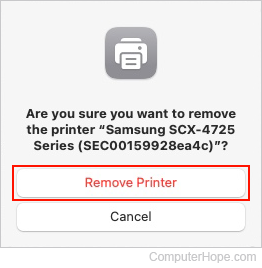
- Click the Remove Printer button in the prompt to confirm the printer removal.
- When you're finished, click the Done button.
