How to change keyboard languages and layouts

Many users know they can change the default language displayed in their operating system. However, they may be unaware that they can also change the language and layout, including QWERTY, Azerty, and Dvorak, for their keyboard.
Today, most standard computer keyboards are automatically detected and set up by the computer operating system. However, those that utilize distinct interfaces, such as FireWire, may require additional software and drivers to function properly. This condition also applies to keyboards with special function keys. We recommend you visit the keyboard manufacturer's web page to obtain drivers for your keyboard.
Furthermore, some keyboard layouts require specific support. As such, you may need to install a separate multilingual or international layout for your operating system.
To change the language and layout for your keyboard, select the Windows or macOS on your computer from the following list.
Windows 11
- Press the Windows key, type Edit language and keyboard options, and press Enter.
- In the Language & region menu, under Langage, click the meatballs menu icon next to the current language.
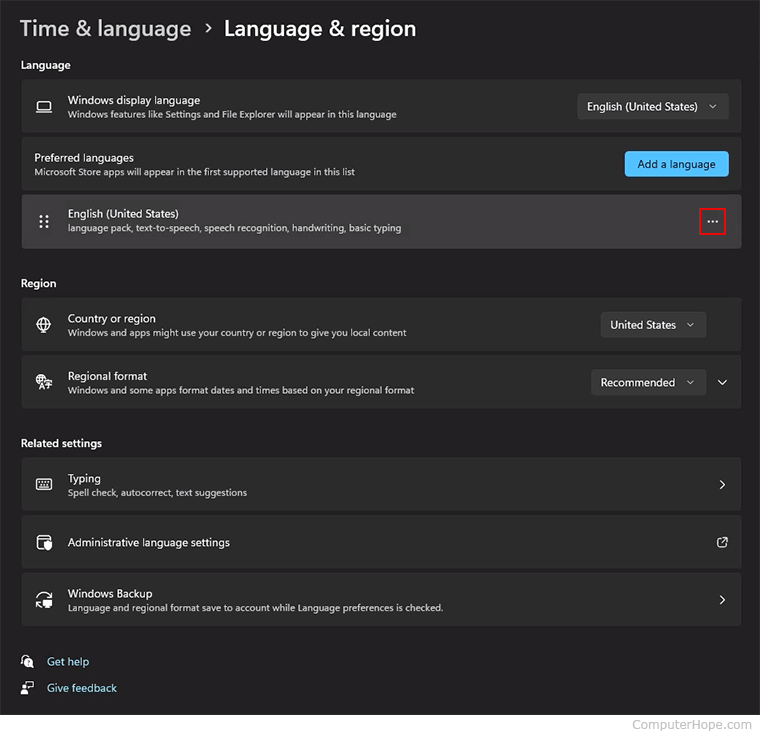
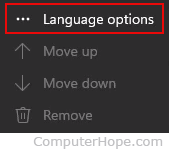
- Select Language options from the drop-down menu.
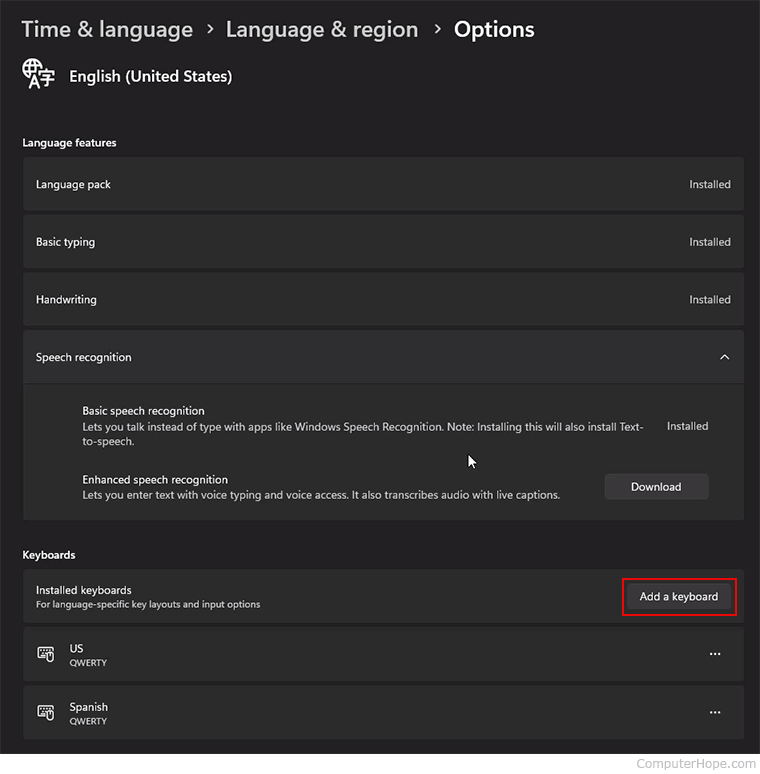
- On the Options screen, in the Keyboards section, click the Add a keyboard button.
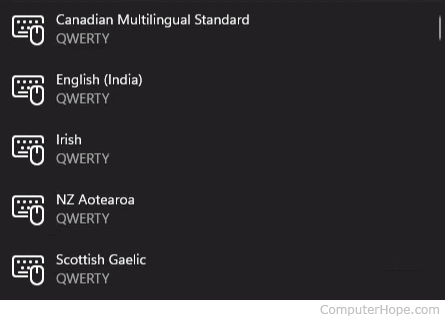
- Select a new keyboard language to add.
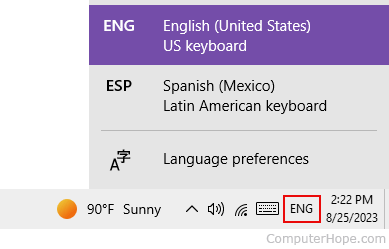
- From here, you can change between keyboard languages by clicking the current language in the notification area and making a selection from the pop-up menu.
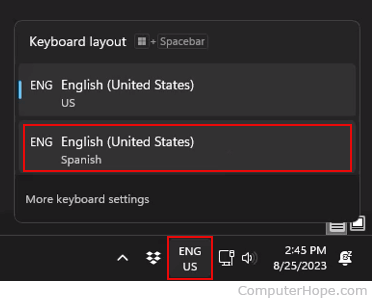
Alternatively, bring up the keyboard languages menu by pressing the keyboard shortcut Windows key + Spacebar.
Special layouts
To change the keyboard layout (e.g., Dvorak or Azerty) after a new language is installed, click Options or the meatballs menu icon (three dots) and click Language options. In the Options window towards the bottom under Keyboards, click the Add a keyboard button.
If you want a unique layout like Colemak, or something other than Azerty or Dvorak, it requires additional software to be installed.
Windows 10
In Windows 10, users must first select or add a language and then add/change the keyboard for that language.
- Add the appropriate language to Windows.
- Once you've added your preferred language, press the Windows key, type Language settings, and press Enter.
- In the window, on the right side, click Keyboard.
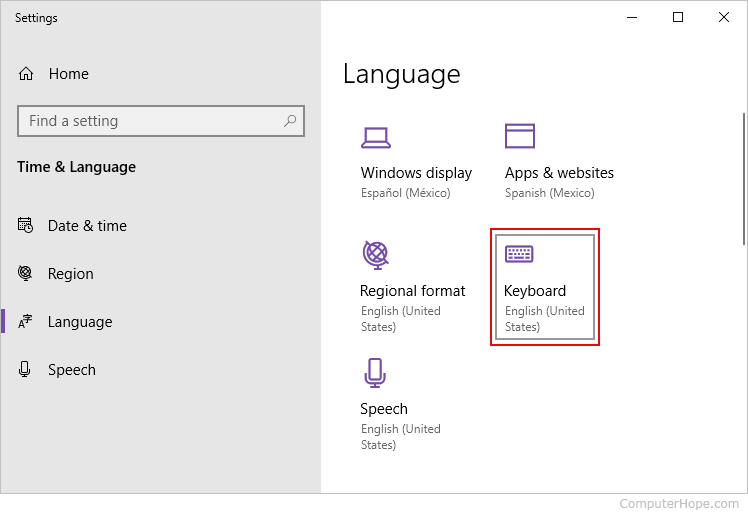
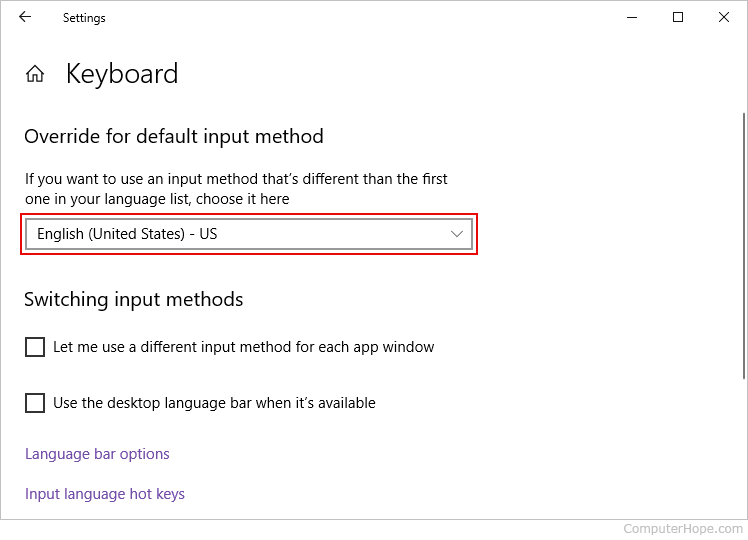
- In the Override for default input method section, click the box to open the drop-down menu for other language options for your keyboard.
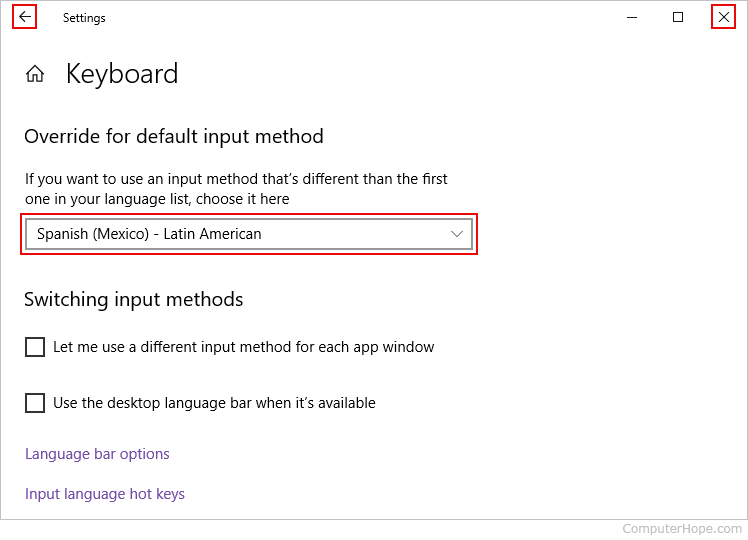
- After you select a language, click the back arrow in the upper-left corner to go back, or the "X" in the upper-right corner to close the window.
Quickly change between keyboards
If you have already added the appropriate keyboard language(s), switch between them by clicking the current language in the notification area and select another from the pop-up menu.
Windows 8
- Press the Windows key, type Change PC settings, and press Enter.
- Click Time and Language and select Region and language.
- Select the language you want to add a keyboard, and click Options.
- Select Add a keyboard and choose your preferred keyboard layout.
If you don't see your desired language in the drop-down menu, add it using the steps on: How to add and change display languages in Windows.
Windows 7
- Click Start, type Language, and click the Change keyboards or other input methods option in the search results.
- In the Region and Language window that opens, make sure the Keyboards and Languages tab is selected.
- Click the Change keyboards button.
- In the Text Services and Input Languages window, on the General tab, click the Add button.
- Check the box for the keyboard layout you want to add, then click OK.
- Click OK in each of the preceding windows to save the addition of the new keyboard layout.
After completing the steps above, switch between the languages and keyboard layouts by clicking the icon in the Systray. Alternatively, use a keyboard shortcut, which is specified in the keyboard layout window.
Windows Vista
Changing the keyboard language and layout in Windows Vista requires you to have the Ultimate edition or Enterprise edition. Home and Professional editions do not have language options.
In Windows Vista, you must first download and install the appropriate language pack. Only then can you change the keyboard language.
Download and install the language pack
- Open the Start menu and navigate to All Programs > Windows Update.
- Click the Optional Updates option.
- Check the box for the language pack you want to download and install, then click OK.
- Run the Install Updates process to download and install the language pack.
Change keyboard language and layout
- Click Start, type language, and select the Change keyboards or other input methods option in the search results.
- In the Region and Language window that opens, make sure the Keyboards and Languages tab is selected.
- Click the Change keyboards button.
- In the Text Services and Input Languages window, click the General tab.
- Under the Installed services section, select your preferred keyboard language.
- Click the Apply button and then the OK button.
Windows XP
- Click Start, Settings, Control Panel, and double-click the Regional and Language Options icon.
- In the Regional and Language Options window, click the Languages tab.
- In the Text Services and Input Languages window, open the Settings tab and click the Add button to add additional input languages or keyboard layouts.
After completing the steps above, switch between these languages and keyboard layouts by clicking the icon in your Systray. Alternatively, use a keyboard shortcut, which is specified in the keyboard layout window.
Windows 95, 98, Me, NT 4, and 2000
- Click Start, Settings, Control Panel, and double-click the Keyboard icon.
- In the Keyboard properties window, click the Input Locales tab.
- To add an input language or a different layout, click the Add button and select the language and layout you want.
Windows 3.1x
- From Program Manager, open the Control Panel.
- In the Control Panel window, open the International icon.
- Select US-International from the drop-down menu and install the new layout using your Windows diskettes.
macOS Ventura and Sonoma
Here is how to add and change keyboard languages and layouts in macOS versions 13 and 14.
Adding a keyboard language
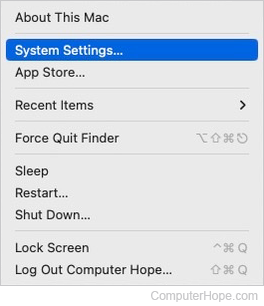
- At the top of the screen, on the far-left side of the menu bar, click the Apple icon.
- Select System Settings from the Apple menu.
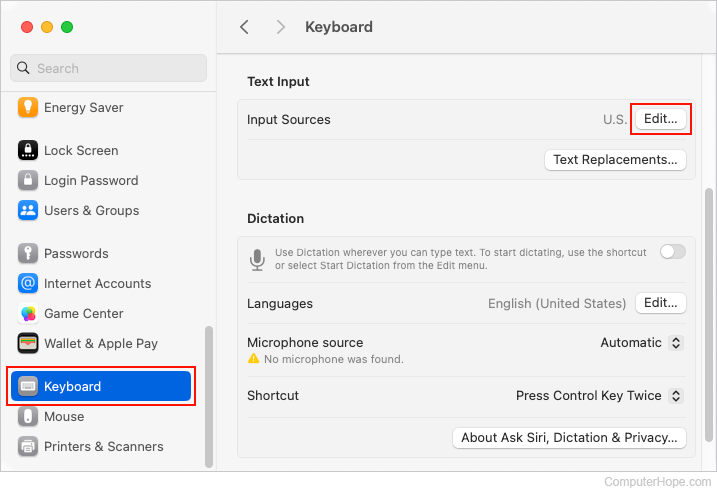
- In the sidebar, select Keyboard. Then, in the section to the right, scroll down and click the Edit button next to Input Sources.
- Click the "+" symbol in the lower-left corner of the next window.
![]()
- Choose a language and input source in the next window. Then, click the Add button.
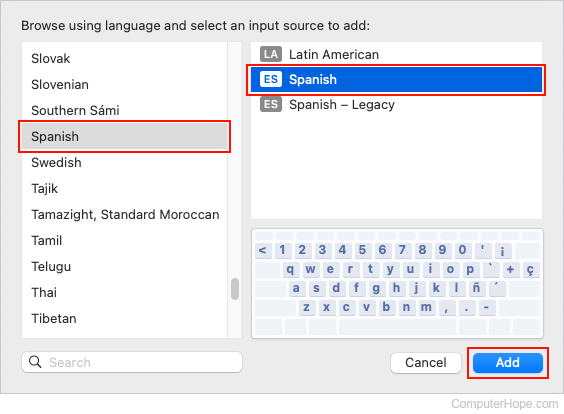
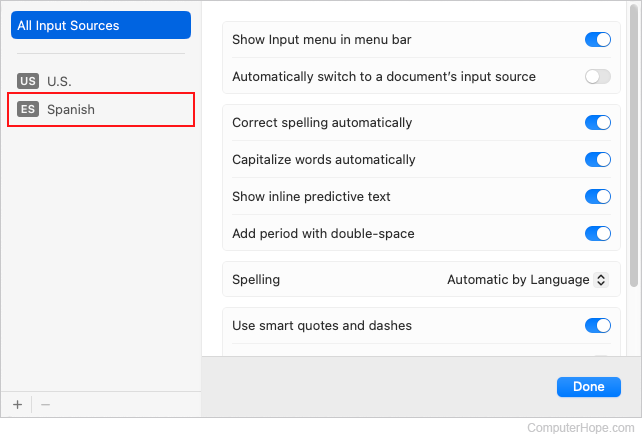
- The new input source (in this case, Spanish) is now displayed in the All Input Sources section.
Changing the keyboard language
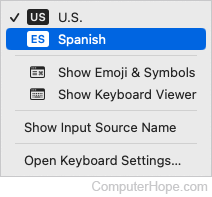
On the right side of the Apple menu bar at the top of the screen, click the language icon.
![]()
Select your preferred keyboard input language from the drop-down menu.
macOS High Sierra, Mojave, Catalina, Big Sur, and Monterey
Here is how to add and change keyboard languages and layouts in macOS versions 10 through 12.
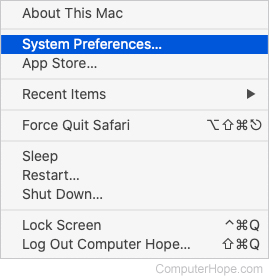
- In the menu bar, click the Apple icon to open the Apple menu, and select System Preferences.
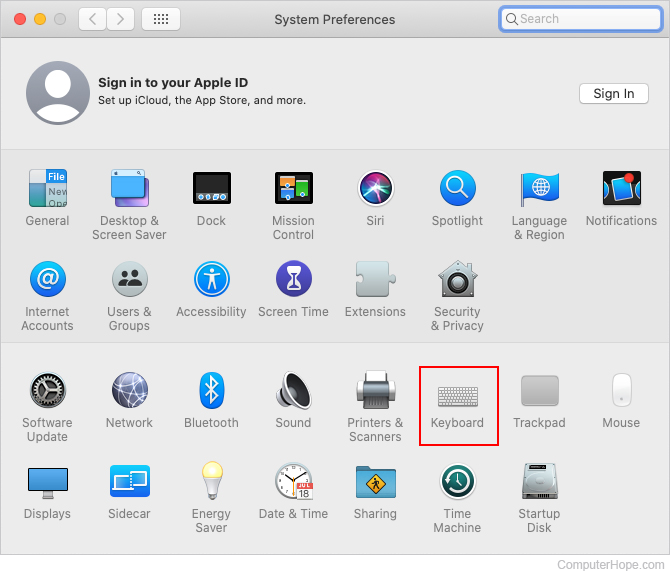
- Click the Keyboard icon in the System Preferences window.
- Click Input Sources.
- Click the (+) Add button and search for a keyboard language/layout. Then, select one or more.
- When you're done with your selections, click Add.
After completing the steps above, change between the different keyboard layout icons by clicking the flag icon in the top-right corner of the screen.
